
A wall can look fine from across the room and still show every shortcut once fresh paint goes on. Nail pops, cracked seams, dented corners, and old wall patches become far more visible under a clean coat of paint. A professional drywall repair process addresses the cause of the damage first, then restores the surface so the finished wall looks flat, solid, and ready to hold paint properly.
For homeowners, landlords, facility managers, and business owners, the goal is not simply to fill a hole. It is to make the repair disappear without creating a weak spot that cracks, peels, or flashes through the new finish. That takes the right materials, proper drying time, and careful surface preparation.
Start by Identifying the Type of Damage
The correct repair method depends on the size, location, and cause of the problem. A small picture-hook hole is a straightforward fill-and-sand repair. A hole left by a door handle, damaged drywall around an outlet, or a section cut open for plumbing work needs backing and a new piece of drywall. A long crack at a joint may point to loose tape, movement in the framing, moisture exposure, or previous work that was rushed.
Before any compound is applied, the damaged area should be inspected for signs of an underlying issue. Water stains, soft drywall, mold growth, repeated cracking, or rusted corner bead deserve further attention. Covering those symptoms without correcting the source often leads to another repair soon after the room is painted.
In commercial spaces, this assessment matters even more. High-traffic corridors, warehouses, rental units, office kitchens, and loading areas can have ongoing impact damage. The repair approach should match the use of the space, including whether a stronger corner guard, more durable finish, or scheduled off-hours work is needed to minimize disruption.
The Drywall Repair Process, Step by Step
A clean, lasting repair follows a sequence. Skipping a stage may save a few minutes at the start, but it can create visible defects once the wall receives primer and paint.
1. Prepare the Area and Remove Loose Material
Furniture, flooring, fixtures, and nearby surfaces should be protected before work begins. Drywall dust travels farther than most people expect, especially during sanding. A clean contractor will contain the work area, use drop cloths and plastic protection where appropriate, and keep the site organized throughout the job.
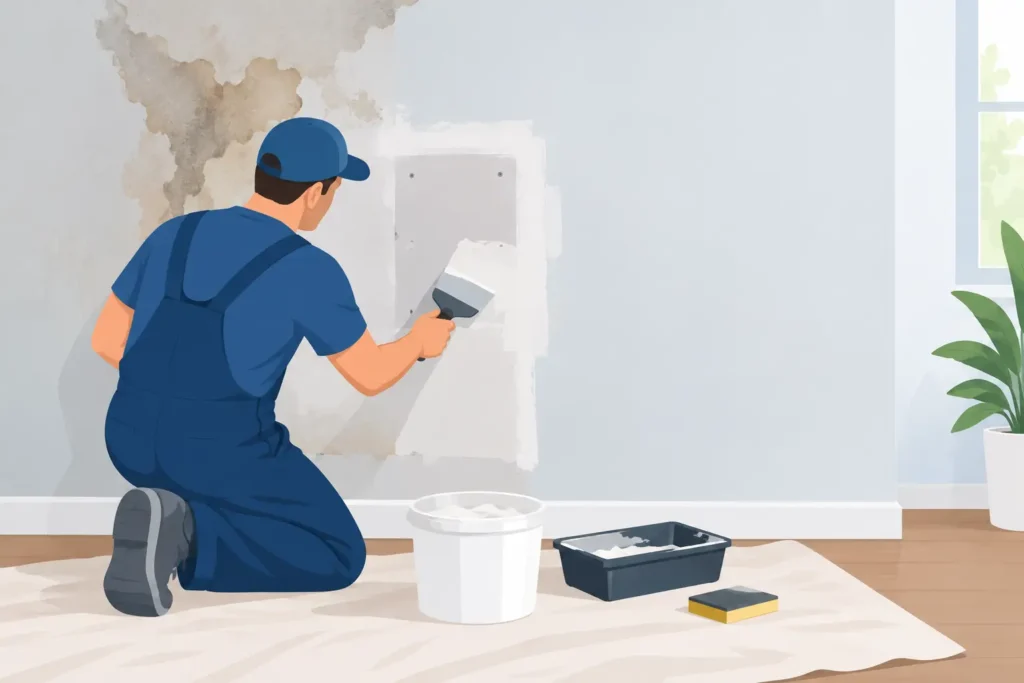
The damaged section is then cleaned up. Loose joint compound, torn paper, crumbling gypsum, failed tape, and unstable edges are removed. For a crack, this can mean opening the damaged seam slightly so new compound has a sound surface to bond to. For a hole, the opening may need to be squared up rather than patched over uneven, broken edges.
2. Stabilize the Wall Before Patching
A patch cannot be stronger than the surface behind it. Small holes may only need a quality setting compound or lightweight patching material. Larger openings require a solid backing, typically wood blocking or a drywall repair clip, before a replacement piece of drywall is installed.
For popped fasteners or loose drywall, the panel should be secured to the framing with appropriate drywall screws. Fasteners are set slightly below the surface without breaking the face paper. If the paper tears, the screw loses holding strength and may create another visible defect later.
Cracked joints require extra care. Loose tape is cut back to the point where it is firmly bonded. New tape is embedded in compound over the joint. Mesh tape can work well for certain repairs, while paper tape is often preferred for flat seams because it provides a crisp, stable finish when installed correctly. The best choice depends on the repair, wall condition, and expected movement.
3. Install Patches, Tape Seams, and Build the Surface
When a section of drywall has been removed, the replacement piece is cut to fit the opening with clean, controlled edges. It is fastened to the backing or framing, and the seams are taped. Outside corners damaged by furniture, carts, or daily traffic may also need new metal, vinyl, or paper-faced corner bead before finishing begins.
Joint compound is applied in thin, controlled coats. The first coat embeds tape and fills the joint. Additional coats are feathered wider than the previous layer so the repaired area blends gradually into the surrounding wall. This wide feathering is what prevents a patch from looking like a raised rectangle after painting.
Trying to apply one heavy coat is a common failure point. Thick compound can shrink, crack, take longer to dry, and create unnecessary sanding. Several thinner coats take more discipline, but they produce a flatter, more dependable surface.
4. Allow Proper Drying Time
Drywall compound needs adequate drying time between coats. Temperature, humidity, ventilation, and product type all affect the schedule. A repair completed in a damp basement or poorly ventilated room may need more time than the same repair in a dry, climate-controlled office.
Fast-setting compounds can speed up portions of the work, especially when a quick turnaround is necessary. However, speed should not replace proper finishing. Even a fast-setting patch may require a separate finishing compound to achieve a smooth final surface. Rushing to sand or paint over material that has not dried properly can lead to blistering, cracking, or uneven texture.
5. Sand, Inspect, and Match the Existing Texture
Once each coat is fully dry, the surface is sanded smooth and inspected under good lighting. Professional painters do not rely only on a quick visual check. They run a hand across the repair, look along the wall from an angle, and identify ridges, pinholes, or low spots that may appear after paint is applied.
The objective is a flat transition from the repair to the existing drywall. Sanding must be controlled because aggressive sanding can scuff the surrounding paint, expose drywall paper, or create a visible depression. Dust is removed completely before priming.
Texture matching is another part of the job. Smooth walls are generally easier to blend than orange peel, knockdown, stipple, or other textured finishes. In many properties, especially older homes and condo units, the repair itself may be sound but still stand out if the texture does not match. A qualified contractor will assess whether the texture can be blended locally or whether a broader section needs to be refinished for a consistent appearance.
Primer Is Not Optional Before Painting
Fresh compound absorbs paint differently from an existing painted wall. If it is painted without primer, the repaired area can show through as a dull, blotchy, or differently textured spot. This is often called flashing, and it is particularly noticeable with dark colors, satin finishes, and light coming across the wall from windows or fixtures.
A quality drywall primer or appropriate primer-sealer creates a consistent surface for the finish coat. It also makes it easier to spot imperfections before the final paint is applied. If the primer reveals a ridge or pinhole, it is far less costly to correct it then than after the room has received two finish coats.
For repairs connected to water stains, smoke, grease, or other contamination, a stain-blocking primer may be necessary. The right product depends on what caused the stain. Ordinary wall paint is not designed to solve every surface problem.
When a Small Repair Becomes a Larger Project
Some drywall issues are isolated. Others signal a broader maintenance or construction concern. Repeated cracks over doors and windows can be related to building movement. Bulging seams may be caused by moisture. Multiple nail pops across one wall can indicate that drywall was not properly fastened or that framing has shifted.
A professional assessment helps determine whether spot repair is sufficient or whether several walls, a ceiling section, or an entire room should be addressed together. This is especially practical when repainting is already planned. Repairing and priming every damaged area before painting provides a more uniform finish and avoids the patchwork look that comes from addressing problems one at a time.
For occupied homes, offices, retail spaces, and rental properties, scheduling also matters. The work should be scoped around access, drying time, dust control, and the need to keep the property usable. JXF Painting Service handles drywall repairs as part of a complete preparation and painting scope, helping property owners avoid the delays that occur when repairs and painting are treated as separate, uncoordinated jobs.
A good repair should disappear into the wall, not become the first thing people notice after a new paint job. Give the surface the preparation it needs, and the finish will have a much better chance of staying smooth, clean, and professional for years.